How to Convert iTunes Library to MP3
iTunes is one of the best music applications that users are enjoying at present. With numerous features and perks that can be experienced, who would not be so interested in this app? Paying the monthly subscription fee won’t matter that much
While using this mentioned application, it is only right that streamers should also be aware that the format of those songs they are purchasing from the iTunes store is in a different format that is not that playable in many music players. This is why learning a guide on how to convert iTunes library to MP3 format would be beneficial as MP3 is known as the most common audio format that is supported by almost all devices and media players.
Are you having a hard time exporting your favorite iTunes songs? Would you want to keep the songs forever even if your subscription has ended? As we go along this post, we will be able to answer the mentioned question as we will be sharing with you the methods and tools that are easy to use and would help you convert iTunes library to MP3 format quick and convenient as well as the usual reasons why people are looking for such ways. Let us now begin!
Article Content Part 1. Why Do We Need to Convert iTunes Library to MP3?Part 2. How to Convert iTunes Library to MP3 with iTunes?Part 3. How to Convert iTunes Library to MP3 with TuneSolo?Part 4. How to Tell iTunes and MP3 Files ApartPart 5. Summary
Part 1. Why Do We Need to Convert iTunes Library to MP3?
Before we finally head to the main agenda of this post, we will firstly be stating and enumerating the common things that most listeners are considering as reasons why they ought to convert iTunes library to MP3 format.
If you are an avid fan of the iTunes application, you should be aware that the usual file formats that are playable in this app include M4A, WAV, AIFF, and AAC. And, if there is a need for you to transform your favorite songs from your iTunes library, you should be knowledgeable about the tools that can help you out.
In the meantime, here is the list of the reasons that we have previously mentioned.
- Some users tend to convert iTunes library to MP3 when they want to have CD of MP3 songs of those tracks on their iTunes playlists.
- If one is interested to import uncompressed audio files into the iTunes app as compressed ones, he will try to convert iTunes library to MP3 in order to save some storage space.
- Exporting of songs and saving those on external drives like USB for playing on other media players such as your vehicle’s stereo.
- For playing on music players that do not support the usual iTunes songs’ format.
- For conversion of high-quality audio files to other file formats in order to lessen the disc space.
- For ripping of CDs via the iTunes app.
There could possibly be other things that people have in mind. The above are only a few of those. If you got all these reasons as well, then surely, you are looking for the same tools to transform your favorite iTunes tracks to MP3 format (which is a much more playable format). And, those will be presented on the succeeding parts of this blog post.
Part 2. How to Convert iTunes Library to MP3 with iTunes?
One easy way in order to convert iTunes library to MP3 format is through the use of the iTunes application itself. You might be wondering but this is really possible. Before, what many users know is that iTunes application is only being used in order to manage files or store media like videos, music tracks, movies, and more. But, this application can actually do more! And, one of its capability is to transform the format of media files.
The one thing that is good with the use of the iTunes application as a converter is that this is totally free of use. If you do not have this application on your personal computer yet, you can easily download and install this via Google play store or Apple store. This app is supported of course by Mac computers and even by Windows computers. So, if you are using a Windows PC, there is nothing to worry about.
Now, we will be teaching you the easy steps in order to convert iTunes library to MP3 format.
- Open your iTunes application.
- Look for the “Import Setting” option.
- Choose the iTunes songs and create an MP3 version.
Though the above three seem to be so easy to perform, we still want to make sure that you will be able to do the conversion without any hassle at your side. So, here are the descriptions corresponding to each step.
Step #1. Open Your iTunes Application
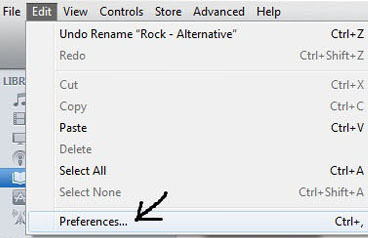
Of course, the first thing that you need to do is to head to your iTunes application and open it. As initially mentioned, if you do not have the app yet, you can simply go to the Google Play Store or App Store to download. After arriving at the main page, you need to look for the “Preferences” button. If you are using a Mac computer, you need to tick the “iTunes” option located at the top left portion of the screen then you will see the “Preferences” menu from those listed. In case you are using a Windows computer, go to the “Edit” button and navigate your mouse to the “Preferences” option.
Step #2. Look For The “Import Setting” Option
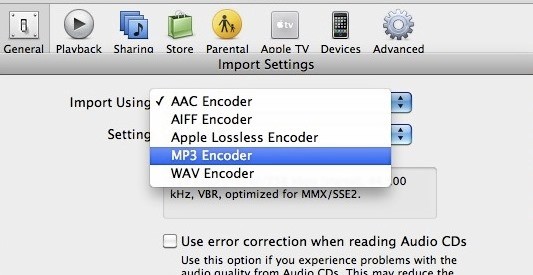
After finishing the first step, you need to go to the “General” tab. From there, you will be seeing new options wherein “Import Settings” is located. You would need to choose the encoding format that you would want to use. Since our agenda is to convert iTunes library to MP3 format, make sure that you will choose MP3. You can choose by using the downward arrow that is alongside the “Import Using” option.
Step #3. Choose The iTunes Songs And Create An MP3 Version
Make sure that upon completion of the second step, you would be hitting the “OK” button to save all those settings made. Now, you can select the tracks that you wish to convert to MP3 format. After doing so, go to the “File” option and look for the “Convert” button. Once done, you need to ensure that the “Create MP3 Version” will be chosen. After some time, the MP3 versions of your chosen iTunes songs will be shown on your iTunes library. You can listen to those now!
The use of the iTunes application might be good. However, there are some shortcomings that any user can encounter. Here are the two most evident.
- During the conversion process, there could be a reduction in the original quality of songs.
- Conversion of those old purchased iTunes songs would not be possible as they are encoded in a protected format that hinders the users from transforming those and downloading on their personal computers.
Is there a better way that one can use other than the iTunes application to convert iTunes library to MP3? Of course, there is! And that would be discussed in the next part of this article.
Part 3. How to Convert iTunes Library to MP3 with TuneSolo?
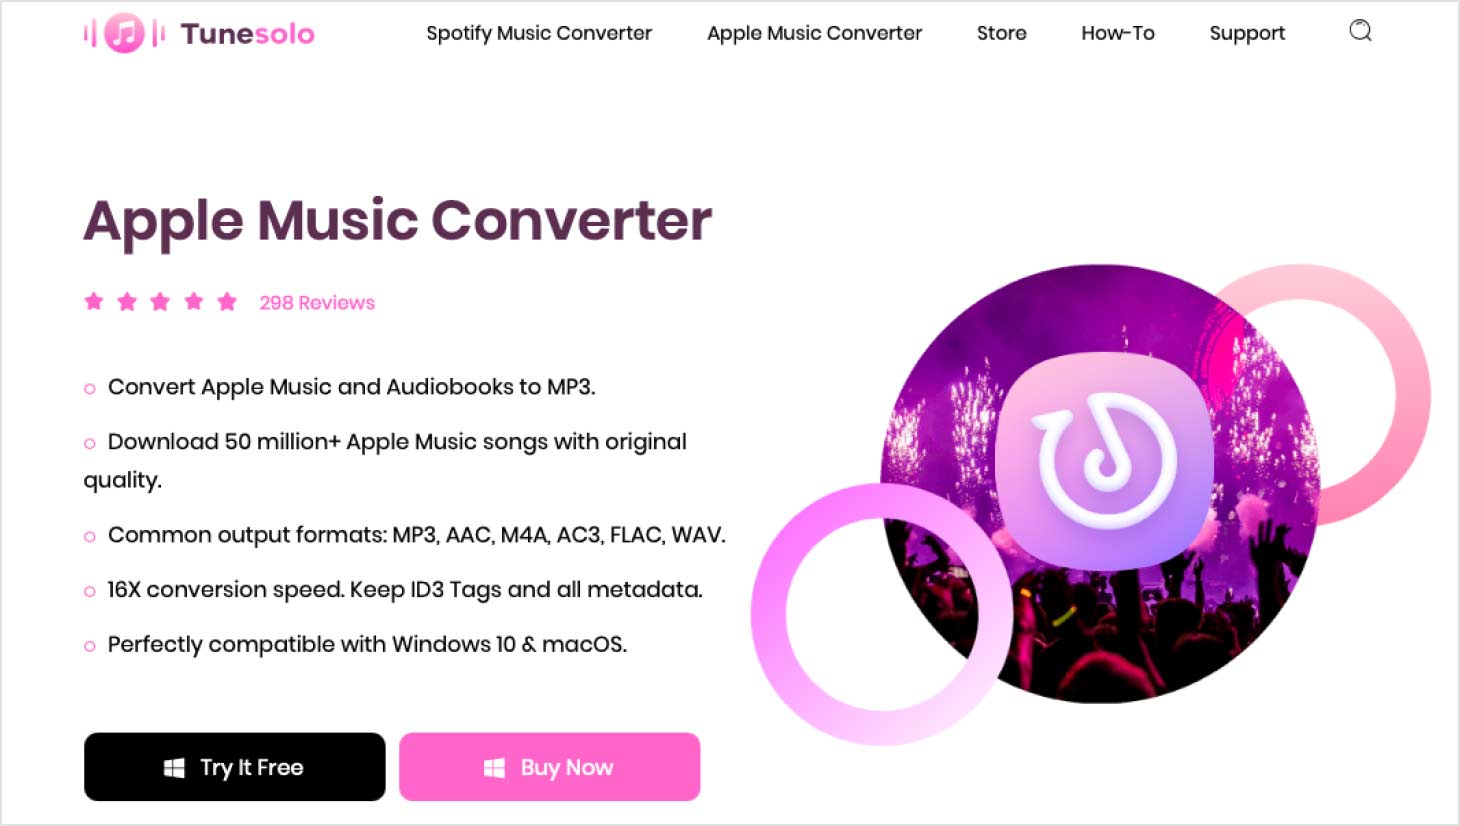
If you do not need to encounter issues during the conversion of your iTunes library tracks to MP3, you need to look for a professional converter that actually has it all! And that is TuneSolo Apple Music Converter!
What makes this conversion different from the iTunes application and any other software tools out there? TuneSolo Apple Music Converter is very capable of a lot of things and here is a summary for your reference.
- It supports the conversion of tracks from one format to another.
- It is capable of removing the DRM protection of files.
- Both conversion and downloading are fast and efficient.
- Installation needs are only a few and easy to accomplish.
- This has a user interface that is easy to navigate.
- Multiple formats are supported.
- Conversion steps are easy to follow!
How can you use this TuneSolo Apple Music Converter to convert iTunes library to MP3 format? Well, that is simple! We have the steps here of course. But before heading to that, keep below note in mind.
Note: Keep your Apple Music and iTunes applications closed during the conversion process using the TuneSolo Apple Music Converter. This is to ensure a smooth and successful file conversion.
Now, here are the steps to convert iTunes music to MP3.
- Install the TuneSolo Apple Music Converter on your PC.
- Upload the iTunes tracks to convert to MP3.
- Finish off by hitting the “Convert” button.
Here are some details for your easy reference.
Step #1. Install The TuneSolo Apple Music Converter On Your PC
Since installation needs for TuneSolo Apple Music Converter are only simple to complete, you can have the tool easily installed on your PC. Once you have it, just simply launch and open the software.
Updated: The new version of Tunesolo no longer requires syncing with iTunes to process the offline music conversion anymore! We have a built-in Apple Music web player to boost download efficiency. You need to log in with the Apple ID to continue the music searching and converting.
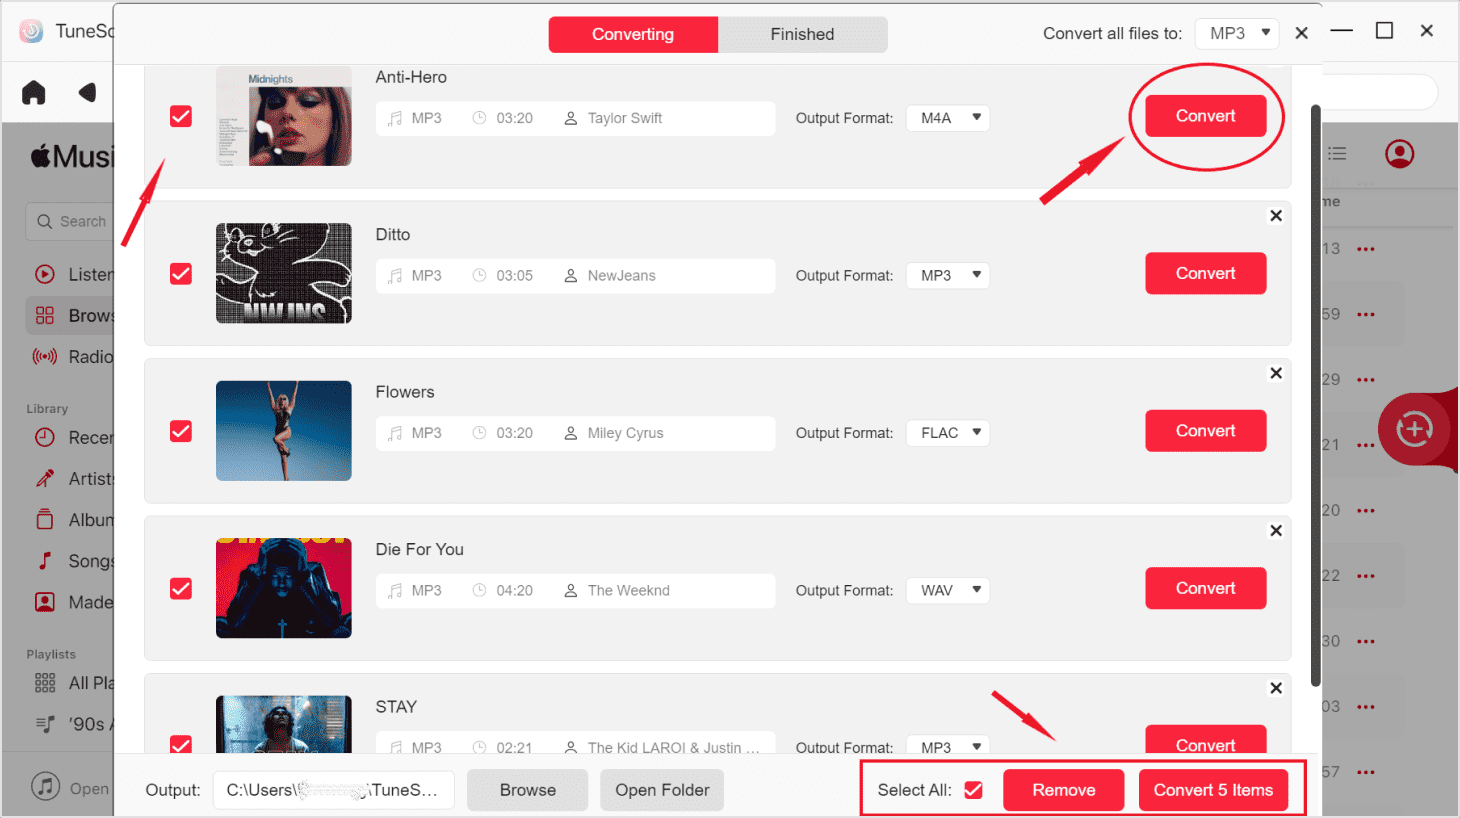
Step #2. Upload The iTunes Tracks To Convert To MP3
The next thing to perform is to add the iTunes tracks that you wish to convert to MP3 format. You can add as many as you want since the tool can process numerous conversions in one go. Make sure that under the “Output Format” you will be choosing MP3 from the list. You can also edit some settings if you wish to and specify the output path for easier access after conversion has been completed.

Step #3. Finish Off By Hitting The “Convert” Button
Lastly, simply tick the “Convert” button that is located at the bottom area of the screen to finally begin the whole transformation process. You will be surprised that after a few minutes, the files will be converted and are ready for streaming.
Part 4. How to Tell iTunes and MP3 Files Apart
Within iTunes, distinguishing between AAC and MP3 versions of a song can be challenging, as they might seem indistinguishable. Nevertheless, each file in iTunes holds fundamental details about the song, encompassing artist, duration, and file format. To identify whether a file is an MP3 or AAC, you can examine ID3 tags, which include information like artist, genre, and other song details, in iTunes.
Step 1: Launch the iTunes application on your computer.
Step 2: Identify the music file and its identical copy within your iTunes Music Library.
Step 3: Right-click on the music file.
Step 4: Choose "Song Information" from the displayed options.
Step 5: Within the song information dialog box, navigate to the File tab.
Step 6: In the File tab, you will find details about the file type, such as "Apple Music AAC Audio File" or "MPEG Audio File." Additionally, you can check specific information like duration, size, bitrate, sample rate, profile, channels, volume, and more.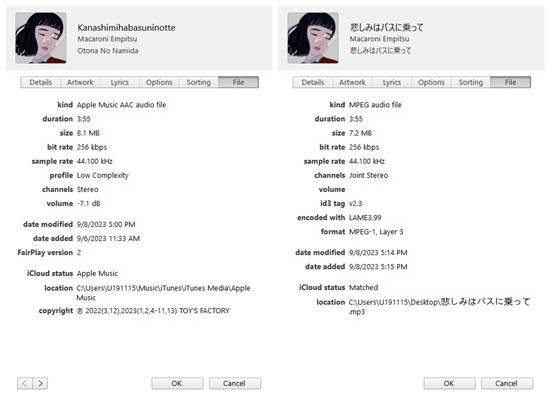
Part 5. Summary
Converting your most loved iTunes tracks from your library to MP3 format is too easy to do, right? If you are having a dilemma when it comes to conversion, why not try the guide presented above? And, let us know if this will work for you!

