How to Backup iTunes Library for FREE [Complete Guide]
Without a doubt, iTunes is very helpful regardless of whether you are a Mac user or a Windows PC user. It can be used for many functions and can serve as a music library and listening app, and many more.
That’s why it’s fairly important that you always have a backup for your iTunes library all the time. This is so that you can avoid a myriad of issues.
This article will help you learn why you need to backup iTunes library and how you can do it. Let’s start with the whys of this subject.
Article Content Part 1. Why Backup iTunes Library?Part 2. How do I backup iTunes library via iTunes?Part 3. The Best Way to Backup iTunes LibraryConclusion
Part 1. Why Backup iTunes Library?
There are quite a few reasons why you need to backup iTunes library. Avoiding data loss is a given, but that’s not the only reason. Here’s a look at some of the issues that can be solved or avoided:
- Data Loss. Considering how common this issue is, there’s no wonder why having a backup of the iTunes library is always a must.
- Once you buy a new computer set, you’ll eventually want to transfer all those on your library into the new computer, and having a backup would make it a lot easier.
- Factory Reset. When extreme system issues occur, the best course of action is to do a factory reset. This will erase all your data, but you can keep them if you have a backup.
- iTunes Issues. Although it’s not as common as data loss, iTunes may experience issues that may mess with your iTunes library, but this can be avoided with a backup.
If you think these scenarios are bad enough, Apple has recently announced that they’ll be replacing iTunes and separate it into three apps.
Since it will be separated, creating a backup iTunes library will actually make it easier to transition to those new apps. This is another quite urgent reason why you need to backup iTunes library.
Now that we’ve answered the why, let’s proceed with the hows.

Part 2. How do I backup iTunes library via iTunes?
Obviously, the main method to backup iTunes library is by using the iTunes platform itself. There are two methods according to the version of iTunes. Let’s start with the earlier versions of iTunes.
Mojave and Earlier Versions
If your iTunes’ version is Mojave or earlier, trying to backup iTunes library means simply downloading all the contents of your iTunes library.
Below are the steps to backup iTunes library:
- Open iTunes on your computer.
- Now on the left side of iTunes, there will be a Library Select the content that you want to backup first such as Artists, Albums, or Songs.
- You will get a list of content according to the selected type. Simply select those that you want to create a backup of.
- Now click on the three dots at the top-right corner of the window and select Download.
Once you’re done manually downloading the content, you will also need to enable Automatic Downloads so that you don’t have to do it again.
- Open the iTunes app on the computer.
- Click on the Music tab on the menu bar.
- Click on Preferences.
- Go to the General tab and here, make sure the Automatic Downloads option is turned on.
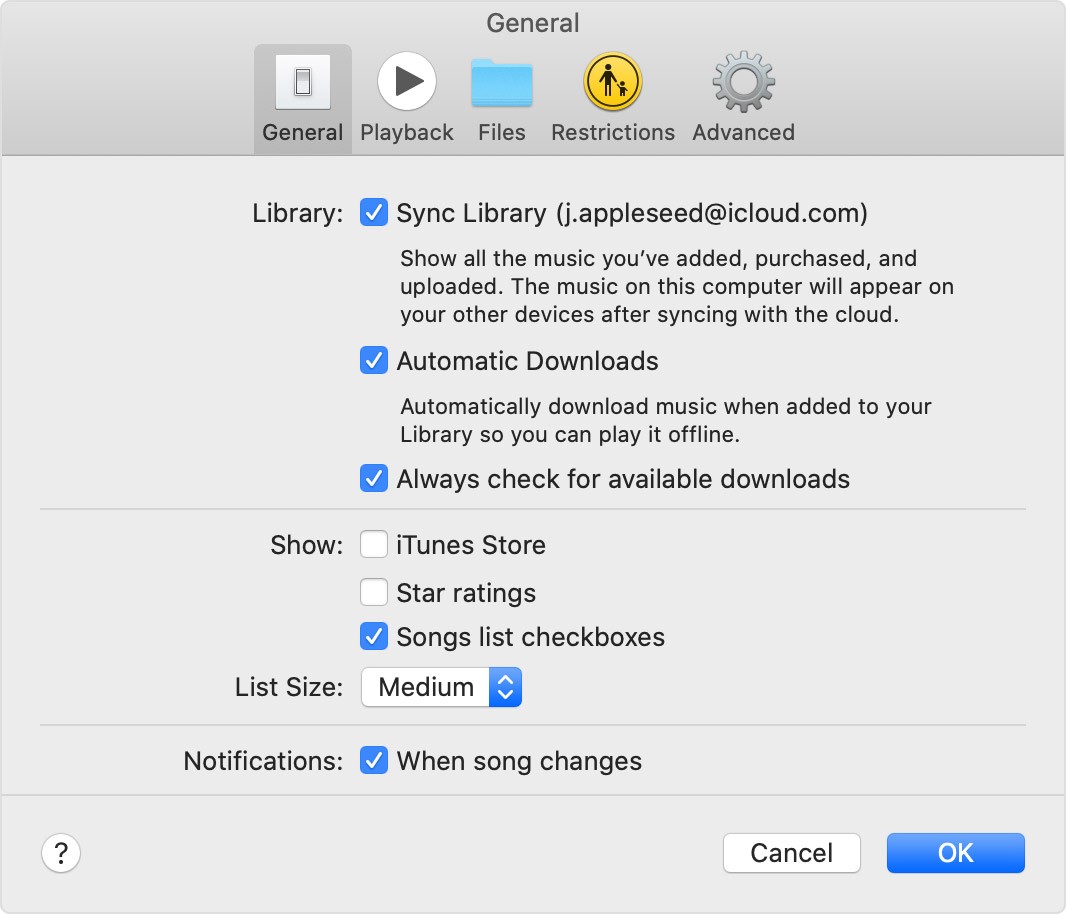
Any content that is added will automatically be downloaded into your computer’s hard drive. And with that, you will have a local copy of the iTunes library, which we can now call a backup iTunes library.
High Sierra and Later Versions
If your iTunes’ version is High Sierra or later, trying to backup iTunes librarywill be a bit more complicated than before, but it’s still doable even for those with no technical skills.
Firstly, you have to consolidate your library which means checking if all the content of the iTunes library is where they should be. Below are the steps to do this:
- Open the iTunes app on your Mac.
- Click on the File tab on the menu bar.
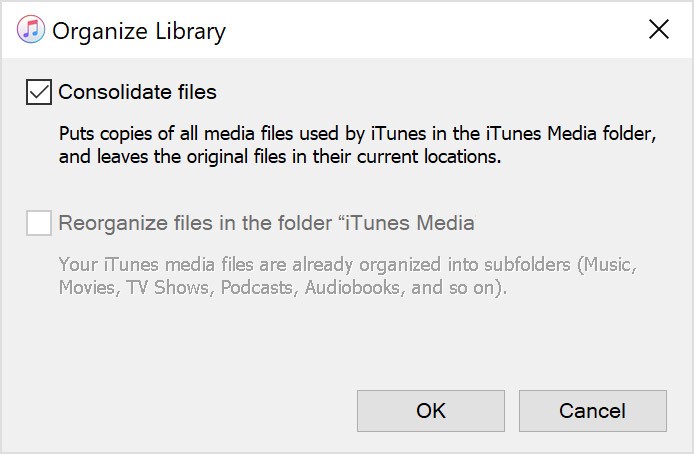
- Select Library and click on Organize Library…
- On the Organize Library window, make sure the option for Consolidate Files is ticked.
- Now click on OK.
This will make sure that all files are where they should be. If they aren’t, iTunes will automatically fix it by creating a copy of all the files into the hard drive. What’s left now is to transfer those files to a backup source:
- Connect the backup source into the computer. This can be an external hard drive, flash drive, or any other storage device.
- Now open a session of Finder for Mac or File Explorer for Windows PC.
- Locate the downloaded iTunes library contents from your hard drive. They are usually found in the Music folder.
- Now launch another session of Finder/File Explorer but this time, open the external backup source.
- Drag and drop the iTunes library contents into the backup source.
You now have a backup iTunes library in case things go south. This should ensure that you can recover from serious damage on your iTunes library without going through too much trouble.
Part 3. The Best Way to Backup iTunes Library
TuneSolo Apple Music Converter is a tool that allows users to collect information such as ID tags from iTunes. Using this info, the software can download the content of the iTunes library such as audiobooks and other audio files. It is capable to remove DRM from iTunes as well.
The software is available to most iOS devices including iPods, iPhones, iPads, and Apple Watch and even devices from other brands such as Xbox, Android, PSP, Zune, and more.
Below are the steps to use this software to backup iTunes library:
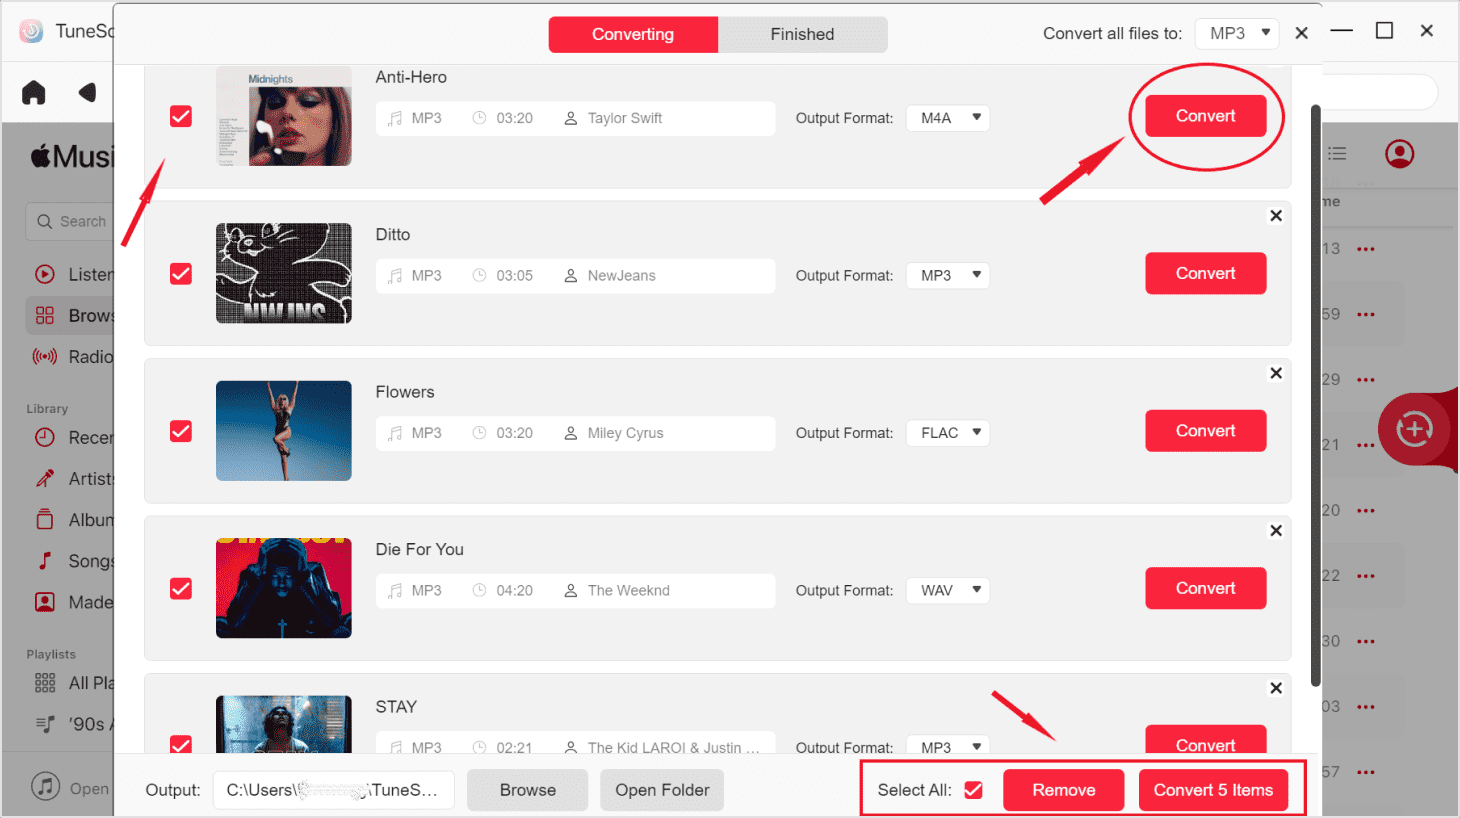
Step 1. Select Apple Music Songs
Open the TuneSolo Apple Music Converter on your computer. Make sure iTunes is installed on the computer as it will be the source of the music. On the main page, there will be a list of music. Simply select the Apple Music songs that you want to convert by clicking on their box.

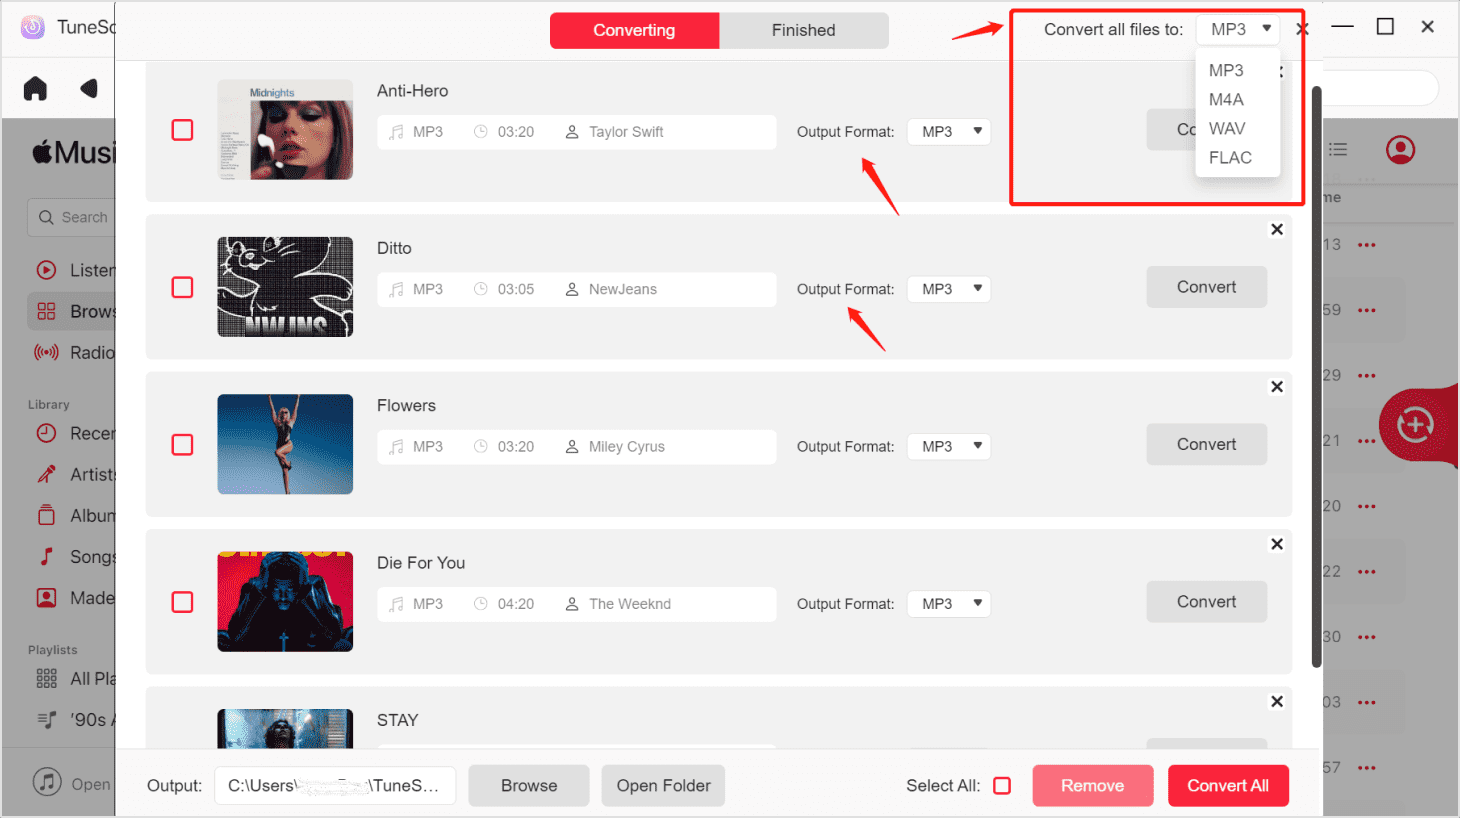
Step 2. Set the Output Settings
Below the list of songs are the output settings. Under here, choose the appropriate format, quality, and other settings for the selected Apple Music.
Step 3. Convert Apple Music
Once you’re done setting up the settings, click on the Convert button below. This might take a while, but ultimately, you will see the results under the Finished tab. Here you can check if you converted the right music and if it’s successful.
Conclusion
Although iTunes already seems quite perfect to some users, there’s always a possibility to lose all the content of the app. That’s precisely why it’s crucial to backup iTunes library so in case the worst happens, you’ll be ready.
On the other hand, if you want to prevent data loss from happening, your best bet would be to take care of the iTunes app. This should make the chances of data loss as slim as possible.

