What Is A Private Session On Spotify [2025 Review]
Spotify is a music streaming service that is popularly known to offer a lot of features and services to its users. For your information, Spotify has an incorporated feature namely “Friend’s activity” or “Listening activity” wherein everyone who follows you can see all the songs that you have listening to lately. But what if you suddenly wanted and thought of making your playlists hidden?
The good news is that Spotify has introduced as well the “Private Session” mode especially designed to cater to the users’ demands with regards to the privacy of their songs. But the question here is, what is “Private Session” on Spotify? What are the steps to follow on how to make my Spotify playlists in Private Session mode?
Article Content Part 1. What Spotify Private Session is?Part 2. How to Start Private Session on Spotify?Part 3. How to Make Spotify Private Session Permanent?Part 4. In Conclusion
Part 1. What Spotify Private Session is?
The “Private Sessions” feature on Spotify allows you to hide your listening activity for a specific period or period of time. If you have this option turned on, everything listed and displayed in your listening activity will be hidden after listening to Spotify. If you open the Spotify app on your device again or if you've been inactive for a long time, a private session will officially begin. This is actually a very useful feature, especially for those who connect their Spotify account to their Facebook account or any other social media account.
Additionally, Spotify has created a feature called “Listening Activity” where a user can share or let other users know about songs that he or she has enjoyed listening to recently. However this is not so comfortable. Because some Spotify users don’t want others to know what he or she is doing recently, so that’s why Spotify launched the “Private Sessions” feature.
But now, let us focus on what is “Private Session” on Spotify and what are the steps to follow on how to enable this option on Spotify.
Part 2. How to Start Private Session on Spotify?
So, since the question of what is “Private Session” on Spotify was already answered in the previous section, let us now tackle the steps on how you can enable Spotify’s, Private Session.
The Spotify application has its versions for many devices, but we would be focusing alone on the steps to follow when you are using your desktop/laptop or your mobile device.
How To Enable Private Session On Desktop/Laptop?
Step 1. The first thing you have to do is open your Spotify app and log into your existing Spotify account.
Step 2. After doing this, look at the upper right corner of the window. Click the drop-down arrow next to it and look for "Private Sessions" from the set of options that appear.
Step 3. Just enable the Private Session option. Once successfully turned on, look for a small lock symbol next to your username.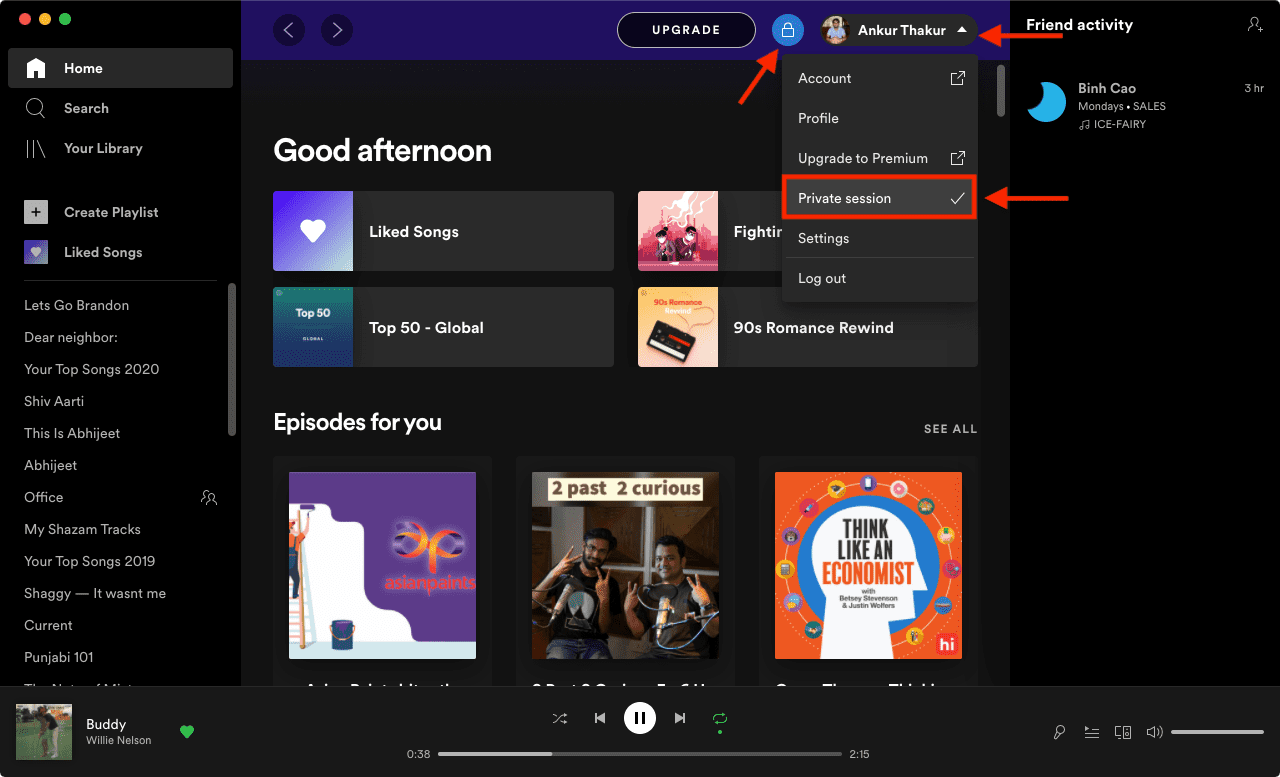
Once done, all of your followers in Spotify and Facebook friends would not be able to see your listening activity for the current time.
How To Enable Private Session On Mobile Device?
It will be a lot easier to enable the private session on your mobile device since, in Spotify’s version for iPhone and Android phones, there is already an option especially allotted and named for Private Session. But I have listed below the detailed steps on how to enable Private Session on mobile devices and to learn more about the results of the answer to what is “Private Session” on Spotify.
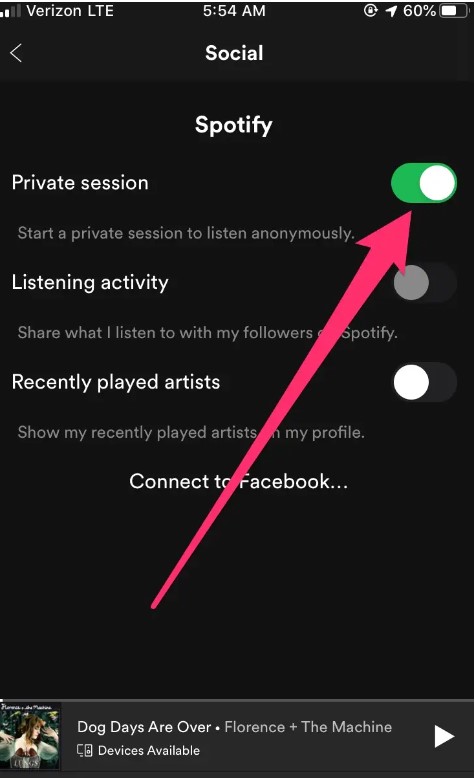
Step 1. The first step is to open your Spotify application and then proceed to open your account settings.
Step 2. Browse the options presented next until you see the “Social” section. Click on it once found and then you will be displayed again a set of options where Private Session is included.
Step 3. Then you just have to turn on the Private Session to enable the private mode on your Spotify application.
A quick reminder for you once again, just like what I said a while ago, Private Session will automatically close or end once you stop using or close the Spotify app. So, make sure that you always turn on the Private Session every time you use your Spotify app if you want to activate the Private mode.
Part 3. How to Make Spotify Private Session Permanent?
In order to completely prevent all of your followers and Facebook friends from learning and knowing your listening activity, it would be best to download your Spotify favorites into your device and then listen to them without the need for an internet connection. In this way, you would not bother yourself anymore to know the answer to the question of what is “Private Session” on Spotify and essentially making your Spotify private session permanent.
The perfect tool that could help you download songs and convert them into another audio format for the purpose of accessing them on any other device is no other than TuneSolo Spotify Music Converter. Let us first have a detailed description of all the features of TuneSolo.
Features Of TuneSolo Spotify Music Converter
Download Spotify Music
The Offline Mode of Spotify is exclusive to all Premium users alone, so if you are using the Spotify application for free, you might be thinking that you will not be able to access all of your favorite songs since you are not allowed to download them into your device. Well, it is just so happy to know that TuneSolo Spotify Music Converter can help you with downloading your favorite playlists and tracks. So, whether you are a free user or a Premium user who wants to cancel your subscription, TuneSolo can help you with this matter.
Convert Spotify Music To Another Audio Format
Your favorite songs from Spotify can all be converted based on what audio format you prefer them to be converted to. Some of the formats available include the MP3 format, AAC format, WAV, and FLAC output format. You can choose from any of these formats since they are the most common and the most accessible formats on a variety of devices.
Best Quality Of Songs
TuneSolo Spotify Music Converter is very capable of giving you 100 percent perfect quality of songs. The original quality of Spotify songs is not lost during the process of conversion, so, you do not have to worry that much about the resulting quality that you would get after the entire process of conversion was done.
Fast Conversion Speed
TuneSolo Spotify Music Converter is not only capable of giving you the perfect quality of converted songs, but it can give you as well the best performance that it could ever give. It can convert your songs up to 5x faster than the normal speed of conversion. Just imagine the total number of hours that you would be able to save just because of this feature alone. For just a couple of hours, you could already have a lot of converted songs.
Keeps The ID3 Tags And Metadata Info
Another good feature of TuneSolo Spotify Music Converter is its capability to preserve all the important information from the songs even after the process of conversion. It was able to keep the ID3 tags of songs and the Metadata info. It is good to know that this kind of information is not lost during the process. This could save you from doing a lot of exhausting and time-consuming work of filling in all the details of each song, especially if you have a wide range of libraries and a lot of converted songs and playlists.
Play The Songs In A Variety Of Devices
The Spotify Premium users were only limited to playing their favorite Spotify songs on up to three devices alone. This is mainly because of the fact that Spotify songs are protected by DRM or also known as Digital Rights Management. With the help of TuneSolo Spotify Music Converter, all of the free users as well as the Premium users can access and play the songs on more than three devices. There would be no limitations at all when it comes to the number of devices that you can use in enjoying your Spotify favorites.
Organize Your Own Music Library
TuneSolo Spotify Music Converter has also allowed users to organize their own music library. You are free to choose by what category you prefer your songs to appear in your music library. You can choose whether to have them by album or by artist or by the corresponding year they are released. You could also save a lot of your time from this feature alone. Instead of sorting or browsing your entire music library, you could just click a specific folder or title where the songs that you want are saved.
Free Updates And Help From The Technical Support Team
TuneSolo Spotify Music Converter has also let all of its users have free updates of the application whenever there is one available. You could also ask for unlimited help from the technical support team if in case you encounter a problem in the middle of the procedure.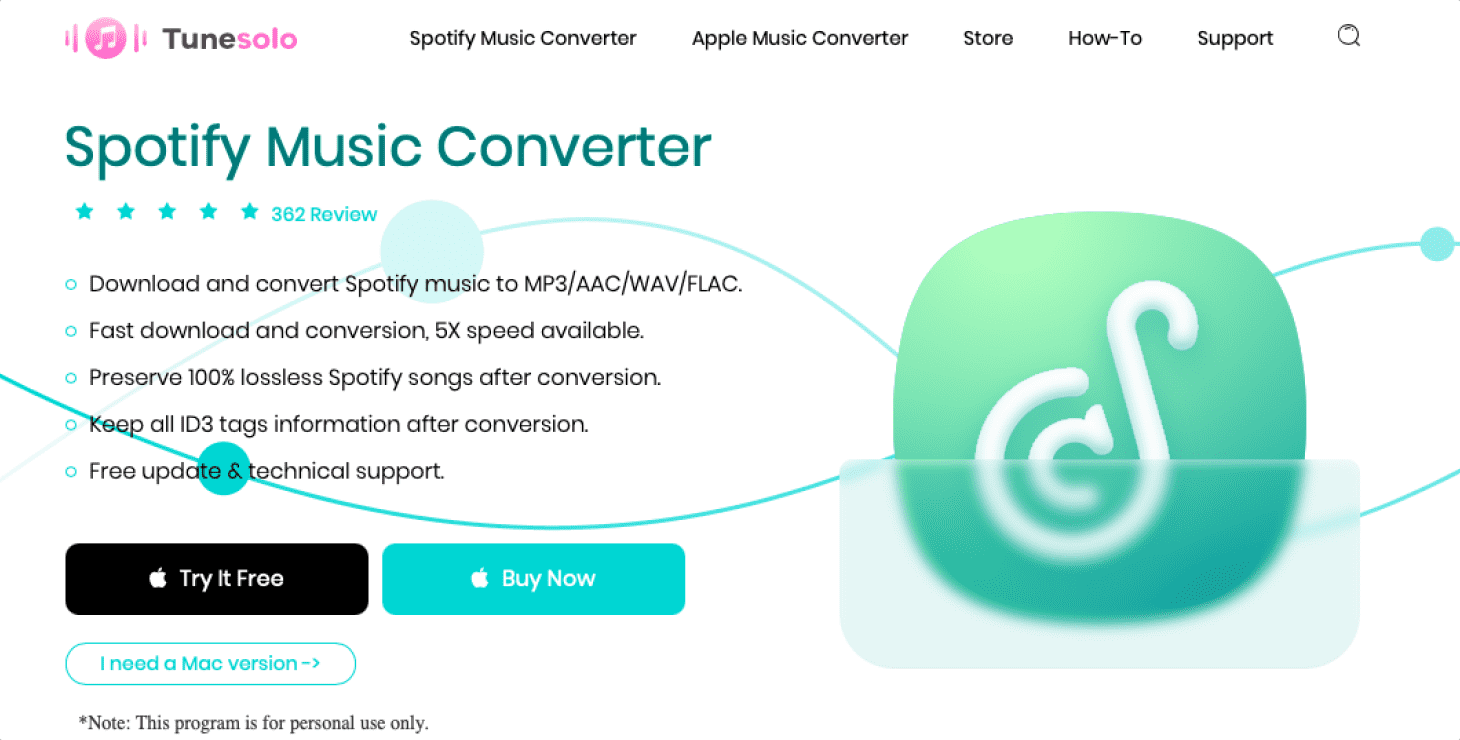
Let us now discuss the steps on how you can download songs from Spotify using TuneSolo Spotify Music Converter.
Step 1. Download And Launch TuneSolo Spotify Music Converter
The very first step that you have to do is to download the application of TuneSolo. In order to do this, you may proceed to the official website of TuneSolo or just clicking the safe button below. After downloading the app, you have to launch and run it on your device.
Step 2. Upload The Spotify Songs On TuneSolo Spotify Music Converter
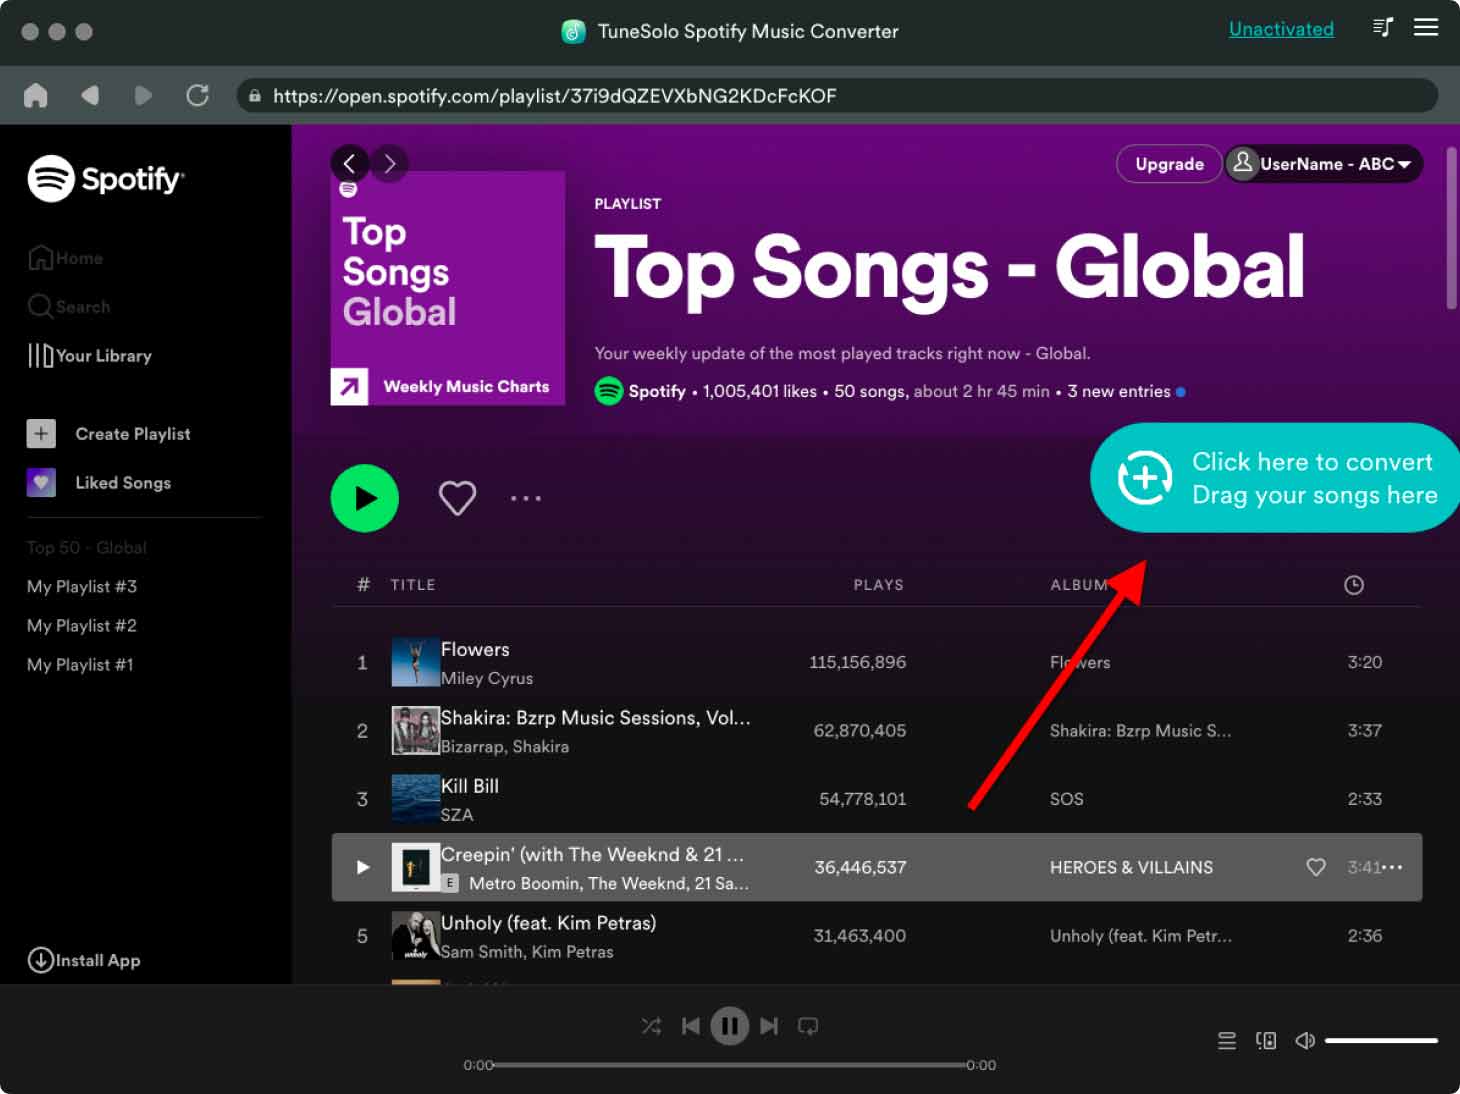
After launching TuneSolo on your device, wait until it loads your Spotify Music library. Once your library was successfully recognized and read by TuneSolo Spotify Music Converter, you may now try uploading your Spotify favorites into TuneSolo. In order to do this just copy the link of the songs and then paste it into the area allotted for it in the converter’s interface. You also have the option of dragging and dropping the song files from your local music library into the converter.
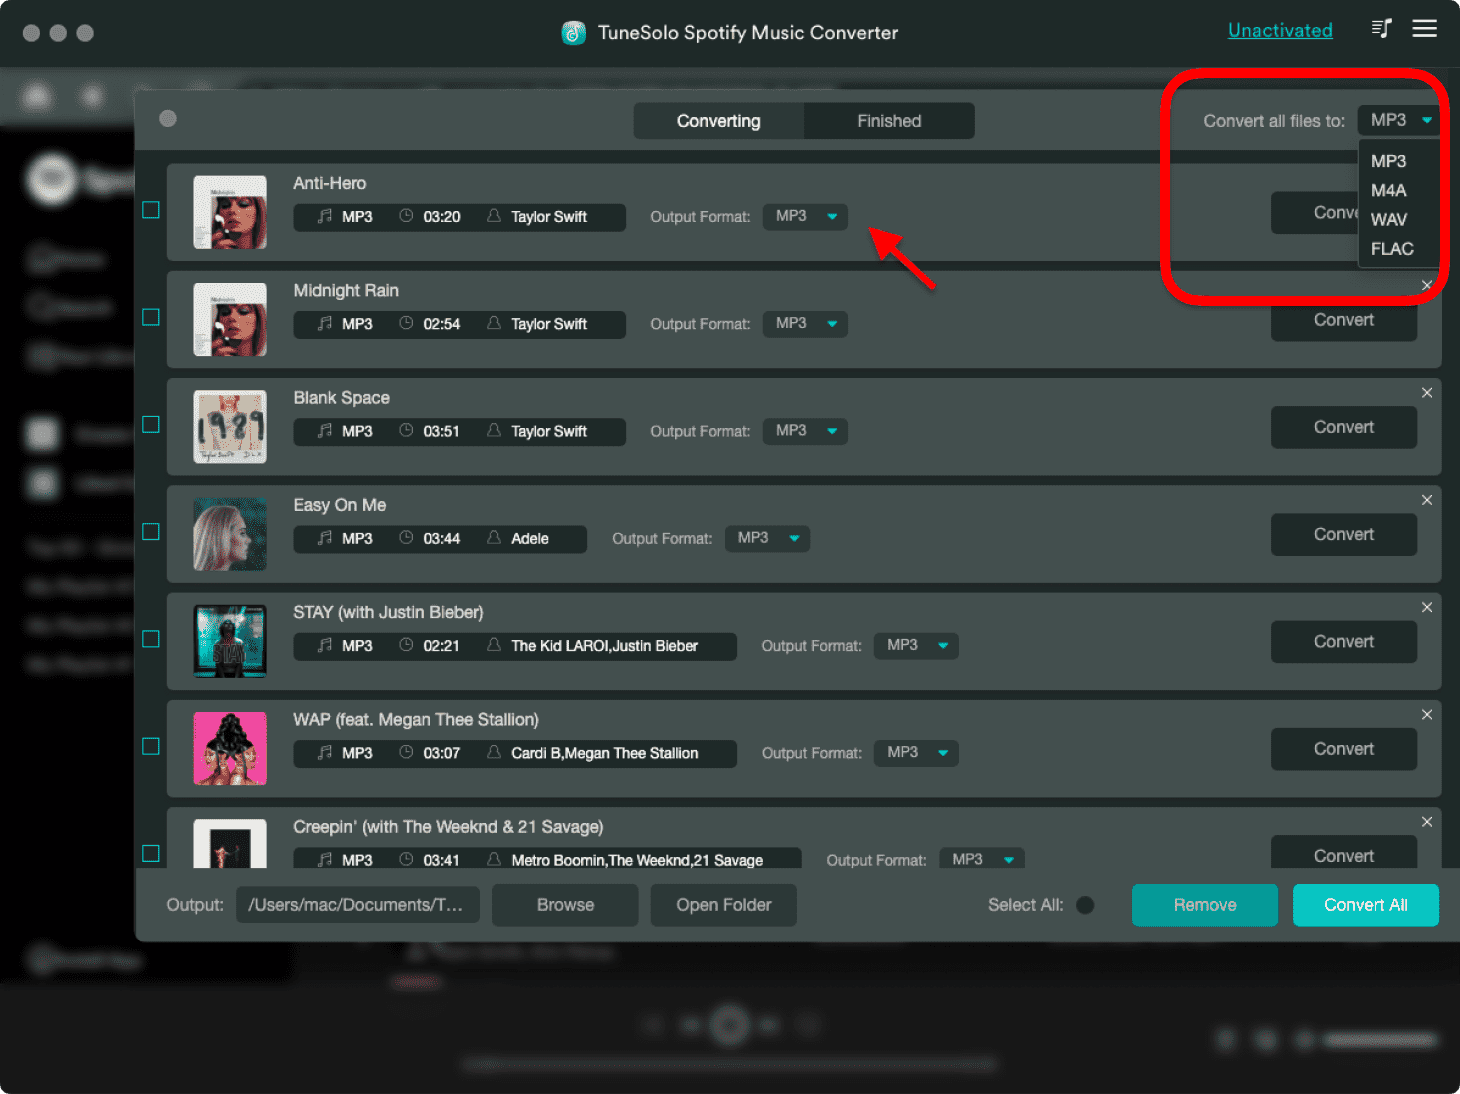
Step 3. Choose The Output Format And The Output Folder
Right after the songs are uploaded, you may now choose the output format of songs that you wish to have. You can choose from the MP3 format, WAV, AAC, and FLAC output format. You may also need to allow an output folder where all the converted songs will go or will be saved once the songs are converted successfully.
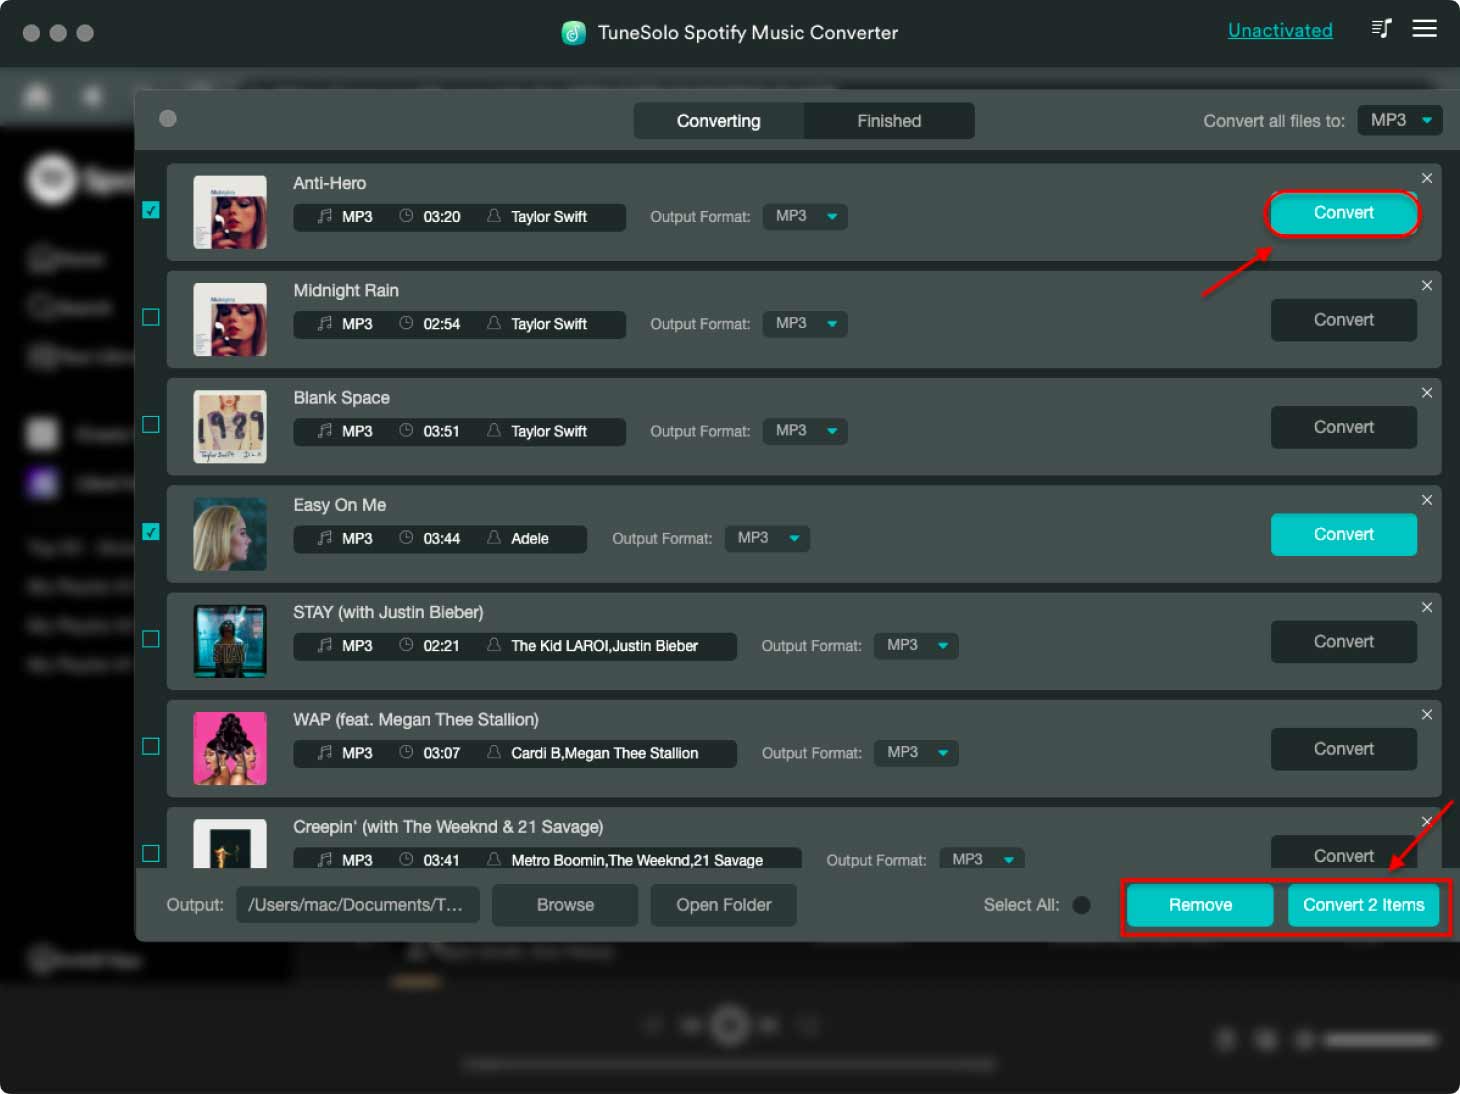
Step 4. Click The “Convert All” Button
Now that the songs are uploaded and the output format was set, you may now click on the “Convert All” button to finally have the process of conversion started. You will only have to wait for a couple of minutes until the process of conversion was done.
Step 5. Get The Converted Songs
You can now check and finally get all the converted songs from the "View Output Files" section. This way you can keep your songs permanently on your device, making your Spotify private sessions permanent.
Part 4. In Conclusion
Not allowing other people to know your listening activity or “Social” activity in Spotify is only natural especially if you are the type of person who wants to keep even a single or tiny information about you on private. In that case, all the procedures and tips that I have discussed above can all help you in achieving your goal with regard to privacy matters.
I do hope that you were able to get the perfect answer to what is “Private Session” on Spotify and the corresponding steps to follow in order to activate the Private mode on the application. Another way of not being in need of answering the question of what is “Private Session” on Spotify is, you can alternatively download all of your most loved Spotify songs on your device with TuneSolo Spotify Music Converter and listen to them privately.

