How to Move iTunes Library to External Hard Drive
The iTunes Library is a database that stores all your music. By accessing your iTunes library, you can easily see all the music that you’ve gathered over the years. Unfortunately, the iTunes Library is not exactly portable, so you can’t move it to other places carelessly.
On the bright side, this task is not impossible. So if you really figure things out, you can find out how to move iTunes library to external hard drive for free. And that’s what we’ll discuss here.
In this article, you will learn how to move iTunes library to external hard drive for free. So without further ado, let’s proceed with the guide.
Article Content Part 1. Things to Do Before Moving iTunes Library to External Hard DrivePart 2. How to Move iTunes Library to External Hard Drive on Windows 10Part 3. Best Way to Move iTunes Library and Keep Songs Forever for Offline ListeningPart 4. Summary
Part 1. Things to Do Before Moving iTunes Library to External Hard Drive
Can I put my iTunes library on an external hard drive? Yes, you can. Finding out how to move iTunes library to external hard drive is easy, as long as you’re in possession of the right steps. So without further ado, let’s proceed with the guide. Before we begin learning how to move iTunes library to external hard drive, there are things that you first need to do.
Before you start
As you may already know, the iTunes library is where all your music and other audiovisual files are located. It should also be noted that the iTunes Media folder and the iTunes library are two different places, in case you read somewhere that they’re the same. Anyway, here are the things you need before you begin:
- Your iTunes library should be consolidated
- You should back up your iTunes library first
So before actually learning how to move iTunes library to external hard drive, we will be learning how to fulfill these requirements first.
Consolidate the Library
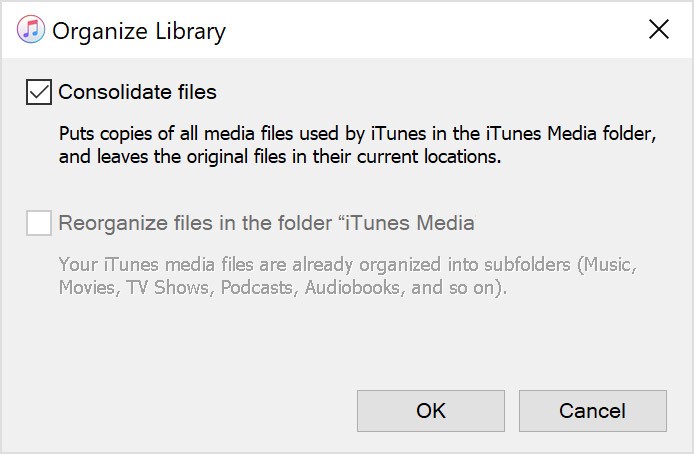
Before anything else, you have to consolidate your iTunes library to make sure everything is accounted for. Here’s how you can do this:
Step 1. Open the iTunes program.
Step 2. On the menu bar, click on File.
Step 3. Proceed to Library and select Organize Library.
Step 4. A popup menu will appear. Make sure the box for Consolidate files is ticked.
Step 5. Click on OK
This will consolidate your iTunes library. By doing so, you are effectively securing your files from other places of your and putting them into the iTunes folder. This will save space for your drive as well as make things simpler to move the iTunes library.
Locate the iTunes Folder
Now that all the iTunes files have been consolidated, they should all be copied on your iTunes Media folder. So, for our next step, you need to find this folder through these steps:
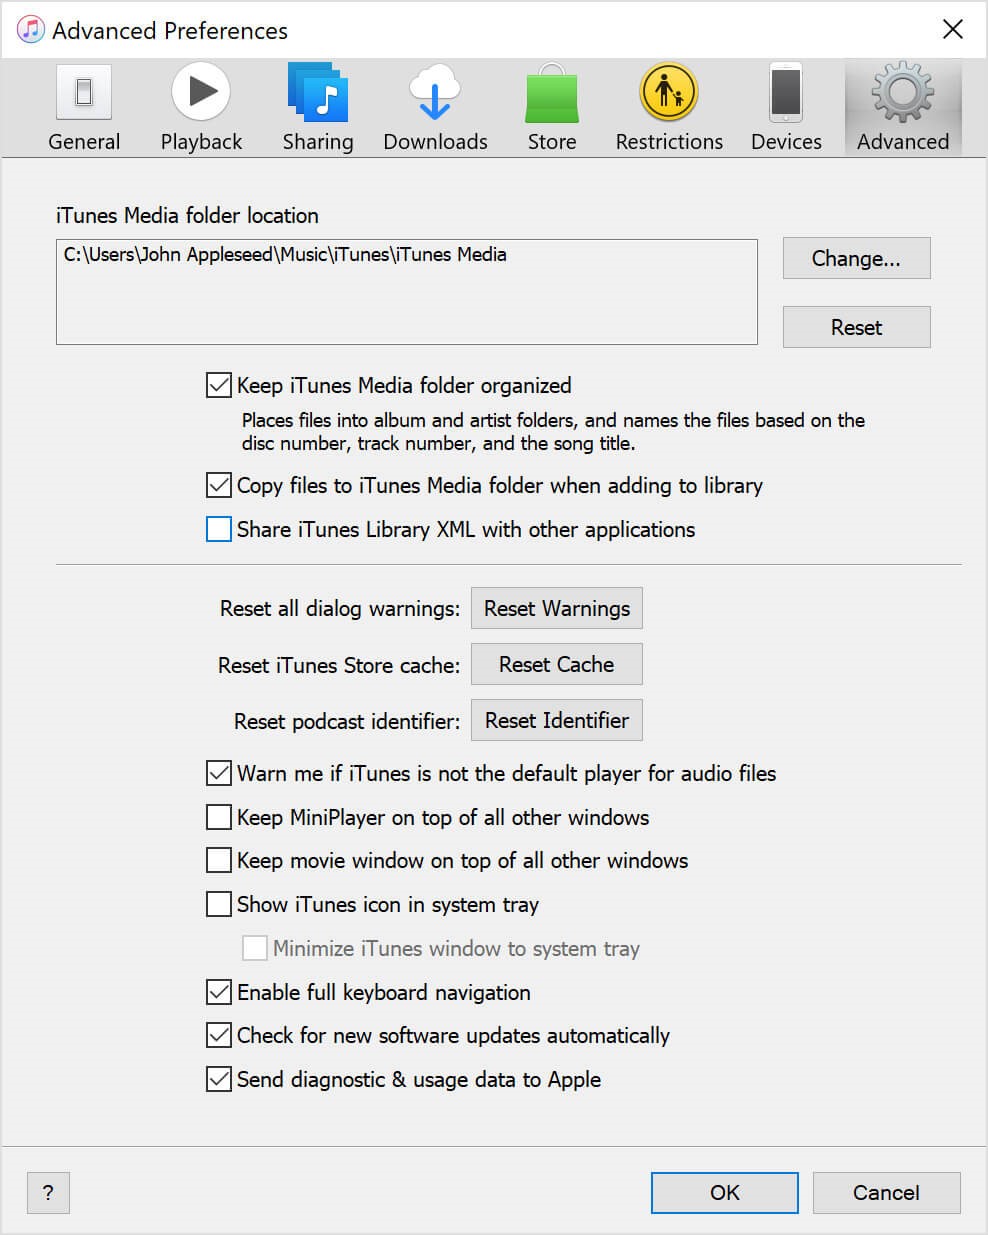
Step 1. Launch the iTunes app.
Step 2. On the menu bar, click on Edit then select Preferences.
Step 3. On the Preferences window, go to the Advanced tab.
Step 4. There should be a box with the name iTunes Media folder location. Go to this location.
Part 2. How to Move iTunes Library to External Hard Drive on Windows 10
After consolidating and backing up your files, you need to move your iTunes library to your external drive. Now how do I move my iTunes library to another hard drive? Your next step is to extract your iTunes library from the iTunes Media folder. This can be done with these steps:
Step 1. Now connect your external hard drive to the Mac or Windows 10 PC.
Step 2. Next, get out from the iTunes window.
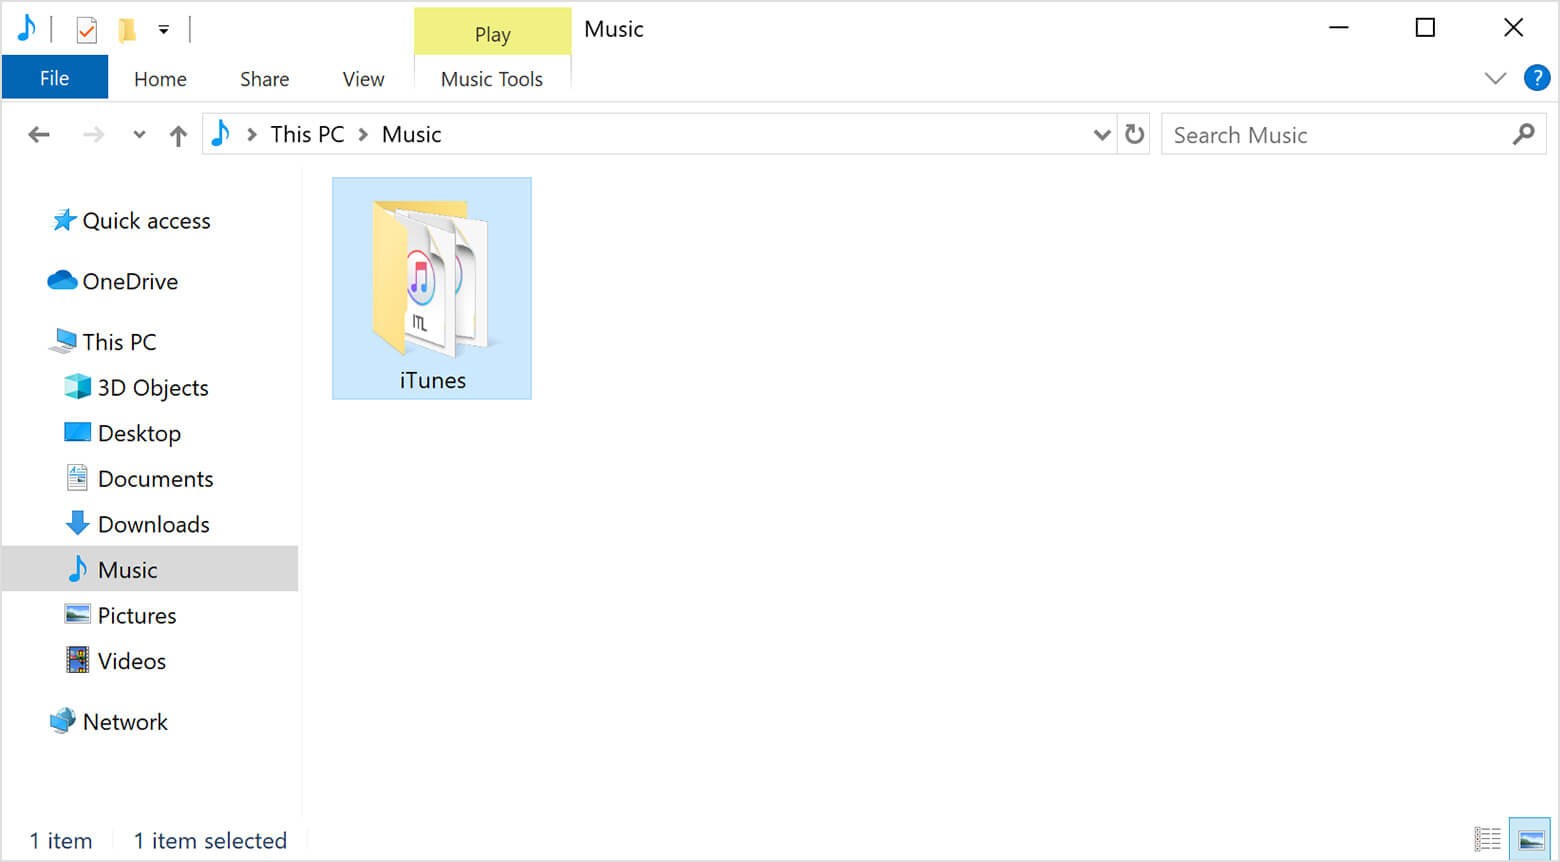
Step 3. Head to the folder that was indicated in the box we previously mentioned.
Step 4. Right-click on that folder then select Copy.
Step 5. Head to the external hard drive storage.
Step 6. Right-click on any blank space on this folder then select Paste.
Note: You can also follow similar steps to move the iTunes library to an external drive on Mac. But only on the previous macOS version. In macOS, Catalina or later does not have iTunes; you can back up the whole mac instead.
This is how to move iTunes library to external hard drive. As you can see, it’s very easy.
Part 3. Best Way to Move iTunes Library and Keep Songs Forever for Offline Listening
In addition to using iTunes to move music from your iTunes library to an external hard drive, there is an easier way to achieve this - TuneSolo
TuneSolo Apple Music Converter is a tool designed to help music lovers like you extract the files from iTunes library. That way, you can move iTunes library and at the same time keep the songs forever. If you want to know more about this software, just continue reading:
Main Feature:
- Offline Listening. You can download all your files from the iTunes library with TuneSolo. After downloading the files, you can keep them forever and listen to them without connecting to the internet. This is supported by iOS devices, Android smartphones, Zune, Xbox, or PSP consoles, and other devices
Other Features:
- DRM Removal. Using TuneSolo, you can also remove the DRM protection from your iTunes library. By doing this, you’re effectively giving yourself full privileges to that file, so you can do whatever you want with it
- Faster Conversion. It’s also a fact that TuneSolo is a very fast converter. In fact, it can go 16 times faster than your typical converters. In addition to that, it can also move several songs at a time, so you can save a lot of time with TuneSolo
- Supported Formats. Although it specializes in files from iTunes library, TuneSolo also supports formats such as MP3, MP4, and WAV. It can also convert from or to protected formats like M4V, M4B, and AAX
It’s not hard to see that TuneSolo has a lot of potentials. So without dragging this out any further, let’s proceed with the steps on how to move iTunes library to external hard drive with TuneSolo:
Step 1. Select iTunes Library Songs
Your first step is to ensure that iTunes is installed on a Mac or PC. After doing so, you can now open the Apple Music Converter Tool. On its main page, you should see a list. This is where you can select the iTunes library songs that you want to keep forever.

Step 2. Change Settings
On the bottom of the window, you will see the Output Settings. This is where you can change different things such as the bit rate, sample rate, and even the format itself.
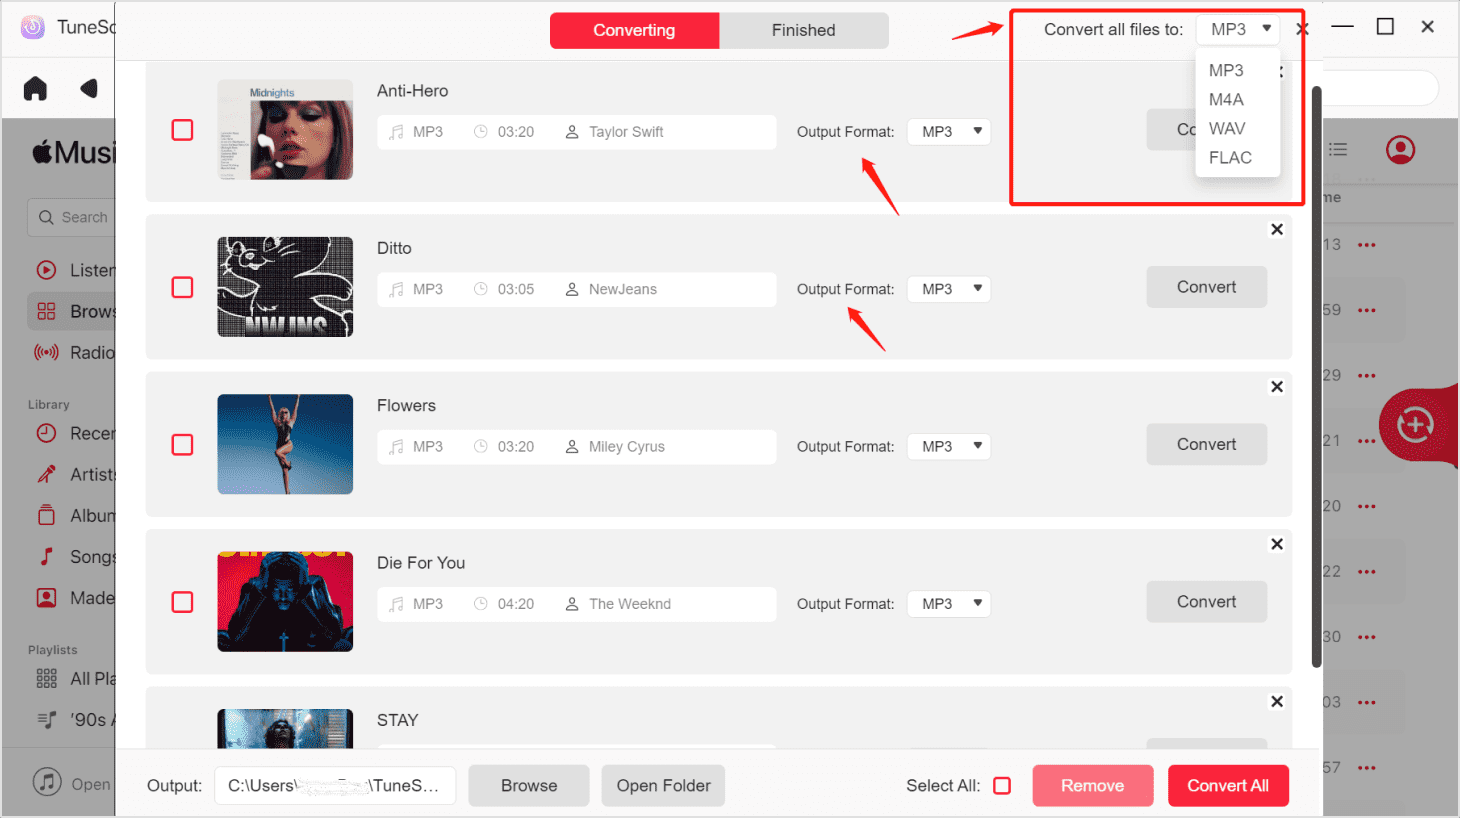
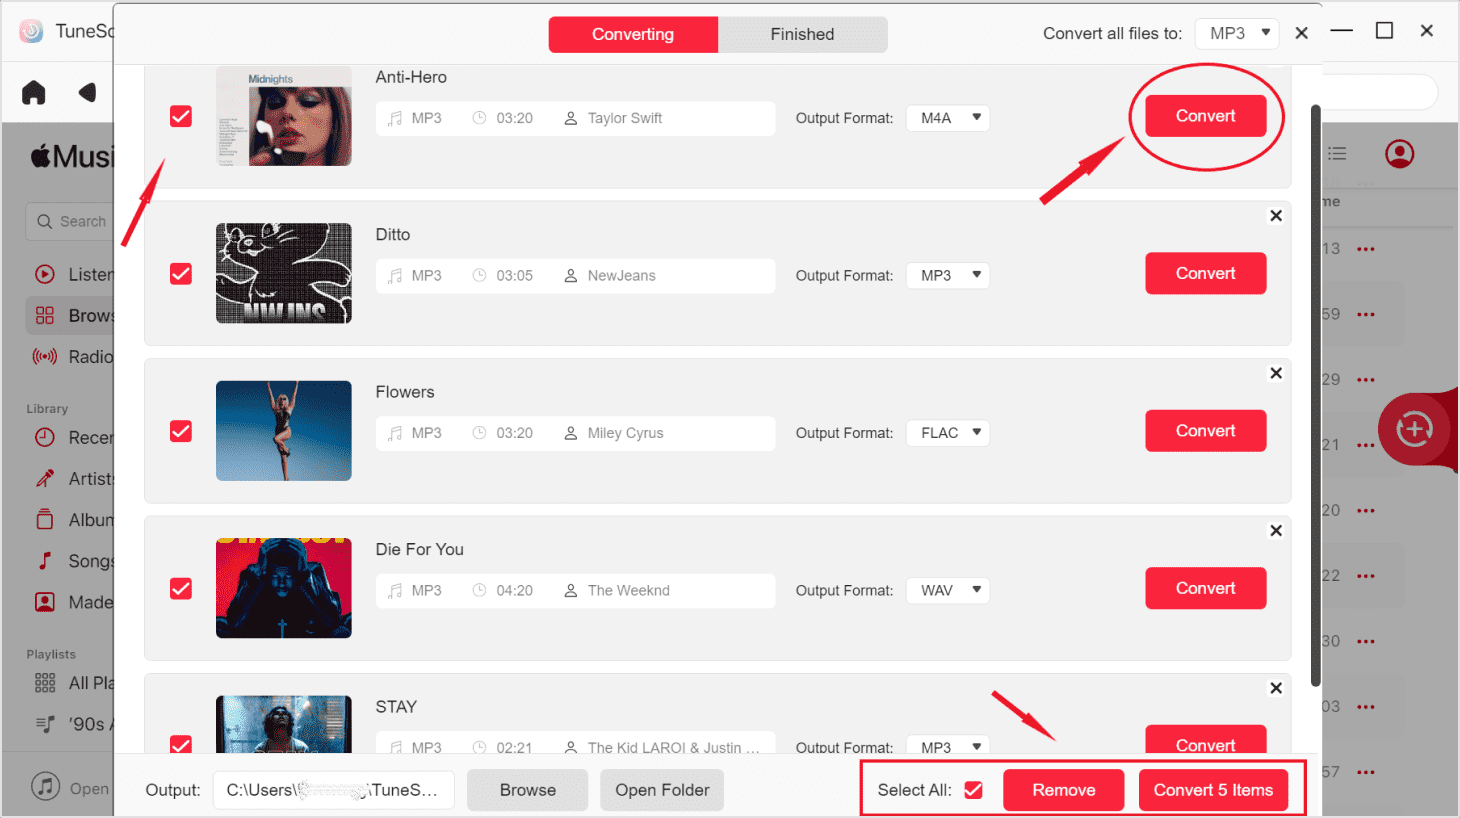
Step 3. Convert iTunes Library
Once you’re done, you can click on the Convert button. This should signal the beginning of the conversion process. All you have to do now is to wait.
Step 4. Move iTunes Library to External Hard Drive
Lastly, connect the external hard drive to the computer. Then, locate the iTunes library that you downloaded through TuneSolo, and paste them into your external hard drive’s storage.
Part 4. Summary
Although many people encounter trouble when they’re trying to learn how to move iTunes library to external hard drive, it’s actually quite easy. You only need to find out the necessary steps and follow them properly just like you did here.
Either way, with this guide, you can find out how to backup iTunes to external hard drive and easily secure your iTunes library. This will come in handy when your computer goes haywire.

